3D Modeling
This section will document what I wish to keep handy regarding Blender 3D.
Low Poly Workflow
Before starting a composition it is good practice to have some reference images and a rough sketch of where you want the final composition to go in terms of disposition and arrangement.
Start by boxing out the different elements with rough primitive shapes until you have your entire composition boxed out.
Then take each element into finer stages of detail step by step, don't try to model the elements from box to final in one go.
Use loop cuts to add mesh (CTRL + R
) but be wary of adding too much to stay in the low poly. Move individual vertices around a little randomly to give character.
Make good use of the Mirror Modifier and Solidify Modifiers to speed up workflow on basic shapes and apply them only when you want to break the symmetry and add finer details (destructive modeling). Scale can be applied on shapes (CTRL + A
) but it is not mandatory and modeling can be done with scales other than (1,1,1).
Beams are useful elements on buildings to join parts together and hide overlaps.
Cut out windows and doors using the knife (K
) tool in the base object. Then select the edges, duplicate and move them outwards, scale them down a bit, separate to make a new object, in that new object in edit mode extrude outwards and then add a solidify modifier. Take care that your normals are facing the right way. If you have mirrors not applied be sure to activate clipping so that the points on the mirror axes don't separate from each others when scaling down.
It's handy to start with a boxed shape then inset faces and extrude them and scale them down along the normal to get quick good looking volumes.
Trees and landscapes can be sculpted with a finer mesh and then decimated using a modifier to bring them back down to Low Poly.
Solidify + Decimate work well together to give jaggedy looks to objects and land parts.
Make good use of the proportional editing (O
) tool.
Good practice : Duplicate elements using Shift + D
and then detach using P
. (e.g. to detach a roof off a roughly boxed building)
Duplicate face loops and extrude along the normals towards the outside (e.g. to create pipe joints)
Careful : Rotations in edit mode do not apply a transformation relative to global axes. It's better to rotate in object mode so the local axes are preserved.
Once shapes have been modeled out, it can be handy to scale by the normals using ALT + S
N-gones are OK to model with as long as they are kept on a same surface. It is safer though to tidy things up with the knife tool to create quads and triangles. Blender converts everything to triangles to render anyways so tidying things up brings you closer to what Blender is actually seeing in your mesh.
If your mesh is chiseled looking and shaded differently because the quads and triangles are not on the same plane you can flatten things out by selecting all the concerned faces and scaling them to 0 along the proper axis.
Useful tip : when using knife tool E
starts a new cut elsewhere.
Careful when using mirror modifiers, if you move in object mode it moves both sides in the same direction along the given axis because it moves the object center around which the mirror is calculated. If you move in edit mode it moves the selection relative to the given axis effectively copying the move on the mirrored side.
When using shapes to cut out mesh in other shapes using the Boolean modifier it is handy to switch the viewport display of the shape being used for the cut into wireframe to see things better. This is done in the Object properties under Viewport Display tab. Don't forget to also toggle it off of the Render in that case.
Don't forget to organize your scene into collections that are easy to manage. Unless you are in a workflow where other people will also work on your models in fine detail it is generally a big waste of time to rename each mesh object in your scene. Collections are there to organize your scene into meaningful elements that you can quickly hide/reveal and or select.
For pavings its better to work with a plane and solidify modifier than with meshes as you don't have to worry about thickness ; don't forget to apply scales as the thickness will be affected by the changes in scale as you duplicate and randomize these objects.
Grass and plants can be made easily with a few loop cuts along a plane and scaling ends down and rotating a bit the edges to get some variation.
You can precisely reset the origin point to a vertex by selecting the vertex and setting the 3D cursor to the selection SHIFT + S
and then setting the origin to the 3D cursor.
You can create a quick long leaf plant by creating a leaf first. A loop cut down the middle bringing the vertices down will create a nice leaf-like bend on it. Then set the origin at the bottom. Then link duplicate the leaf (ALT + D
) and rotate it 45°. Then SHIFT + R
to repeat the duplicate 8 times so you fill the plant. Then give a bit of random variation to each leaf with scaling and rotating.
At this point you understand the big difference between linked duplicates and non-linked duplicates : with a linked duplicate, you can still make changes in object mode that won't affect the other copies and still gives variation. This way you keep the possibility of editing the shape in Edit mode and having the mesh edit apply to all the copies. While non-linked duplicates can all be edited separately but do not have the easy fast modification applying to all copies.
Poke faces is useful for creating a collection of triangles on a big N-gone like circle shape.
Applying modifiers is really up to you and depends on if you need to edit the full mesh (in which case apply) to break symmetry
Texture slots enable you to give different textures to different parts of a mesh. To do so, select the parts of the mesh and select another slot material and click assign.
Eevee vs Cycles : Cycles is a Ray based renderer while Eevvee is a screen based renderer. Eevee tries to keep things as simple as possible and kind of flat while cycles is trying to be as realistic as possible. Eevee is a real-time renderer while cycles is more resource intensive and requires many samples to produce good results. Surfaces that are emissive will have a much better render in Cycles than in Eevee.
When beveling you can press CTRL + B
and then V
to bevel a vertex and create a triangle face where the vertex was. Direct shortcut is CTRL + SHIFT + V
. When beveling vertices, use J
to join opposite vertices that were created to re-triangulate the faces and correct the geometry.
Texturing
PBR materials
PBR stands for Physically Based Rendering : the materials react to the environment surrounding it in a physically realistic way.
Use Cycles render engine for this.
Texture Coordinates
For all the texture nodes use a Texture coordinate node (use output Object
) and a Mapping node (use input Vector
). Hook the output Vector
of the Mapping into the input Vectors
of the each texture images.
If you have Node Wrangler add-on activated, the keyboard shortcut CTRL + T
will automatically generate these nodes.
Incidently, using Node Wrangler add-on you can select the Principled BSDF and use CTRL + SHIFT + T
to open a bundle of maps and have them set-up as a Principled Texture.
Base Color
Keep the diffuse image in sRGB
colorspace but if your mapping on an object use a Box
projection instead of Flat
.
Roughness
For roughness use Non-Color
colorspace and Box
projection as well.
Normal
For the normals use Non-Color
colorspace and Box
projection. Use a Normal map node to convert the output Color
to the input Normal
of the Principled BSDF
Displacement
The displacement avoids the Principled BSDF and goes directly into the Displacement
input of the Material Output. This is because the displacement actually affects the geometry of the object whereas the Principled BSDF affects the way it looks.
Displacement must be activated in the Options under the Surface
tab (choose : Displacement and Bump instead of Bump Only)
Displacement works best when there are many polygons on the object (use of a Subdivision Surface modifier is advised) and adds a good bit of detail. The drawback is it takes a lot more processing power and it's use is not advised for games.
Box Projection Method
Box projection has the advatage of being quick to setup, works with modifiers (e.g. bevel) and automatically updates if you modify the shape (e.g. extrude).
However, it does not work with a game engine, which require a proper UV Map (hence, we cannot choose the Object
output of the Texture Coordinate Node).
UV Map Method
UV Map on the other hand requires to properly unwrap your object but once textured it can be exported easily to a game engine. The downside is you will see the seams, and there is no way to blend it so you should think carefully about where you place them, and keep your objects at a safe viewing distance. Another inconvenience is that you have to apply the modifiers for the seams to be set properly so it is slightly destructive.
Both these methods however keep the advantage of being able to easily change the PBR texture.
Texture painting
You can also load an image into a texture brush and paint directly on the object. In which case, choosing a random tiling and a large brush along with isolated-click painting instead of strokes can result in a good looking object. One drawback is the object has no roughness and the texture looks a bit flat.
In the case of texture painting, there is a way to add a bit of normals and bumpiness using the data from the image texture and a few color ramps as so :
Texture Atlas
A texture atlas is a custom image combining many different textures all in one image. It has the huge advantage of asking the CPU/GPU to load only one image and pick all the textures for different objects from parts of that image. The inconvenience is that each texture will have a lower pixel resolution (being part of a greater image)
Seamless textures
Using seamless textures is useful as the texture will repeat itself when scaled without it being too noticeable at a glance. However, if you scale too much, a pattern will become visible as the texture repeats itself.
There are two ways to scale :
In the node editor, on the mapping node :
In the UV editor, by scaling the unwrap. This second option is preferable if you are going to export your scene to a game engine as the UV unwrap (and it's scale) will be exported with it.
A handy feature of seamless textures is that they will continue applying if you modify your geometry. One good way to do this is with an edge slide (Shortcut : G
+ G
). If you want to edge slide beyond the existing geometry you need to remove clamping (Shortcut : C
while edge-sliding).
Procedural textures
Procedural textures are created by using nodes instead of images or photographs to create a material. Basic texture nodes are mixed together (often with a MixRGB node) and the Color output is then used to give both roughness and normals to the material.
When creating textures with this method it's important to think macro-details and micro-details and mix them together. The Scale
value of the basic texture nodes can be used to this effect.
A rapid shortcut to create a mix node is to CTRL + SHIFT + RIGHT-CLICK & DRAG
from one node to the other one that you want to mix.
The procedural textures can be very easily tweaked and modified. They do not require much artistic skills as opposed to the creation of textures based on images and photographs (although those are often available for free or a small fee on many platforms online). One downside however is that these textures need to be baked to be exported to a game engine, although that is a minor downside as baking is often required when exporting to game engines anyways.
Scultping
Workflow
Start by remeshing : SHIFT + R
to choose voxel size then CTRL + R
to remesh.
A handy shortcut to toggle selection between objects in Sculpt Mode is to hover over the object you want to select and then ALT + Q
Face count
A good figure to start sculpting is anywhere in the tens of thousands of faces for small features and hundreds of thousands for large features. For very detailed sculpting, modelers often go into the tens of millions of faces but this does require an adequate machine (High end CPU & GPU and 64 to 128 GB of RAM).
Collection & Links
Appending a file to another allows you to bring in any collections from the original file you want to import from. The collection is brought with all it's objects and is more editable.
Linking on the other hand imports a collection as a single object. Note that the origin point for that object will be the world origin from the original file, so if the collections are not centered on that world origin it will be offset when you link it. Also note that the link is not dynamic so any change made to the object in the original file will not update in the other project until the first one is linked again.
Learning Parts
These are a few 3D models I made following various tutorials to learn Blender.
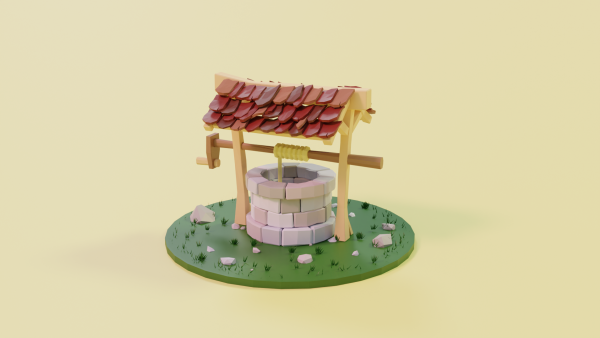
Low Poly Well
Recap
- Uses a bend modifier to create a circle with basic shapes.
- Uses a nice simple low poly esthetic with bevels and moving a few vertices around
- Shows the use of a lattice to parent an object or group of object to follow modifications made to the lattice (bends and such)
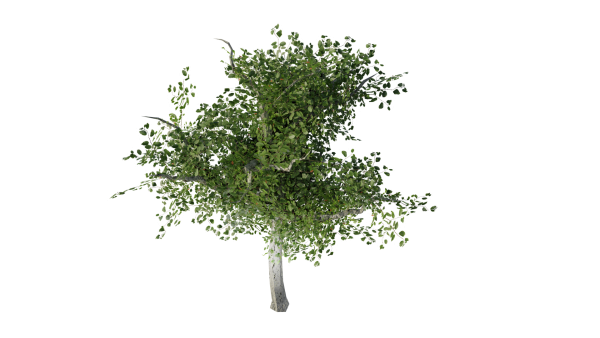
Low Poly Tree
Recap
- Use basic extrude (CTRL + Right Click) in Edit Mode to quickly get trunk and branches
- Use the 'image as plains' addon to create a branch from an image with a transparent background
- Add a particle system to multiply that branch using vertex group to focus it only on the branch and not on trunk + with a lot of random scale/rotate it gives a realistic impression
- Texture the bark of the tree
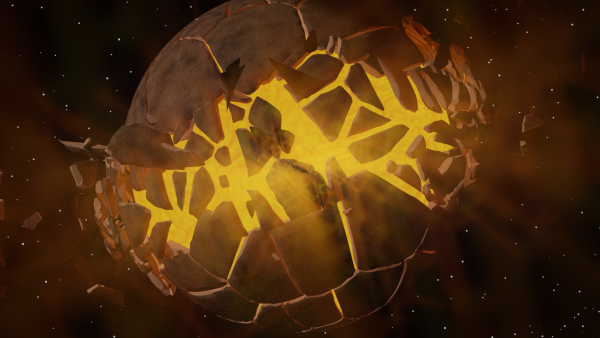
Cracked Planet
Recap
- Use the cell fracture add-on
- Basic particle system use and how collections work instead of layers with that add-on
- Use basic mix shader materials with voronoi displacements
- Use compositing node with backdrop to use a render image as a ghost to draw gas around the planet
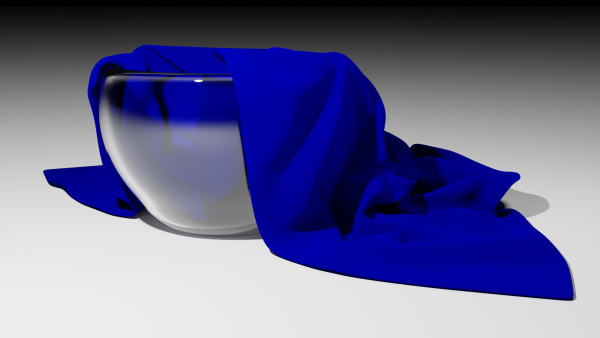
Cloth Simulation
Recap
- Introduces the use of integrated cloth animation to render cloth materials (let it drop and choose the keyframe where you find it to your liking)
- Also uses basic glass materials and basic lighting
Painting Displacement on low poly meshs
Making Spiral meshes
Use addon tool : Add Curve : Extra Objects.
- Add an Archemedian curve spiral.
- Tweak the Turns, Steps, Radius Growth and Height properties before validating the spiral.
- Go into the Data panel and under Geometry > Bevel add some Depth. Activate Fill Caps option.
- Convert the curve to a mesh and go sculpt.
Useful shortcuts
Mesh Editing
H
/ALT + H
: Hide / Unhide objects in object modeALT + S
: Scale along normals in Edit modeSHIFT + N
: Rcalculate NormalsO
: Toggle proportional Editing ON/OFFCTRL + A
: Apply menu to apply scales, rotations, etc.CTRL
while moving objects : Applies snapping (if snapping is disabled) or disengages snapping (if snapping is enabled)CTRL + X
: Dissolve selection (Vertex/Edge/Face)
Selection
CTRL + Right Click & Drag
: Lasso select (according to object centers) in Layout ModeCTRL +/-
: Select more / less of mesh (based on a first selection of faces or edges or verticesSHIFT + S
: Cursor selection pie menu
Sculpting
SHIFT + R
: See & Change Voxel Size of RemeshCTRL + R
: Apply Remesh